Monday, October 10, 2016

Why NaNoWriMo Is A Must Do For Writers


NaNoWriMo is in 22 days!! I can't put into words how excited and nervous I am.


For those who don’t know, NaNoWriMo, or National Novel Writing Month, occurs every November. It consists of writing 50,000 words in one month (just about 1,667 words per day). NaNoWriMo is an amazing experience! I highly recommend it to anyone who wants a challenging,  fun, supportive writing community with amazing resources! Here are a few tips for making the month successful:


  1. Lock up your inner editor: NaNoWriMo has this thing about locking up your inner editor. It’s SO true. We are always our biggest critics, so this one’s a biggie. I’m guilty of this, myself. But, and I hate to say it, you will get nowhere if you don’t allow yourself to write crap first.
  2. Time management: Manage your time!! A lot goes on in life, and it can be hard to even get time to sleep. For me, I’m in all honors classes as well as an AP, and the workload can be extensive, so finding time to write can be very difficult. In order to win NaNoWriMo, it’s important you set aside time to write.
  3. Prepare: Even if you’re a complete pantser, it’s best to at least prepare a little bit. Otherwise, it’s going to be really hard to get the ball rolling when you hit arguably the most difficult part-the middle.
  4. Bribe yourself: It’s best to have some sort of motivation for times when it requires a little more effort to get that next chapter written. Some people
  5. Do what you need to do to keep writing: Whether it’s bribing yourself like above, or sitting in a certain room in the house, do what you need to do to get yourself to write. I use my m&m jar and music. I use Spotify whenever I write or do homework; it keeps me going. I’ve even found that music has become a pivotal part of my writing process- I’ve begun to designate certain songs for certain scenes in my book. Find what works for you.
  6. Have fun: No matter what happens, have fun! You’re writing for a reason; that you love to write. It’s going to be super frustrating at times, and you just have to remember that you’re doing this because it’s what you love to do. ❤️
First off, NaNoWriMo has a ton of awesome sponsor offers exclusively for NaNoWriMo participants. I’ve already taken advantage of the Ulysses sponsor offer, and it’s great amazing.

Fifty-thousand words is roughly the length of a short novel. It may seem like an unreachable feat, but at only 1,667 words a day, it’s quite manageable. That doesn’t even include the innumerable amount of support. NaNoWriMo isn’t just an experience, it’s a community. From NaNo prep to “what do I do now,” you have support every step of the way.
If you opt-in to give your zip code, there are multiple opportunities for local write-ins. I wasn’t able to attend one last year because I was always busy, but I’m hoping to make it to one this year!
Along with local events, NaNo has an immense social media presence. They have multiple accounts, including one for word sprints. They are incredible about being active and reaching out to the community.
The world needs your novel.
The world needs your novel. This is a central theme during NaNoWriMo. The world needs your novel. And your novel needs you to write it. Through transitive property (who thought we’d be using math in English?!?), the world needs you to write your novel.


If you're interested in participating in NaNoWriMo, click here.

Thursday, September 1, 2016

DIY Coloring Page Binder Covers

It's that time of here. Everyone's going back to school and soon we'll be surrounded by crunchy leaves and pumpkin spice.

While it's really fun to shop for school supplies and purchase new clothing, school itself can be very stressful. If you've read my prior post, you know that I have a newfound love for coloring books. They are great for stress relief, making them perfect for the school year.

Plus, they're great for after you've finished tests or assignments!

I decided to combine my love of coloring with my love of school supplies to create binder covers with coloring pages. You can find templates on the internet for this sort of thing, but this is a way to make it your own.


Materials

-Printer (with copy function)
-Computer
-Coloring book (optional)
-Binder(s) (w/ pocket front)


Steps

1. Pick out your coloring page. You can print them out from a website if you'd like, but I used my printer to make a copy of pages from my Disney coloring book. If you're copying, you may need to trim the sides of the picture as sometimes the binding of the book casts a shadow. I left the shadow for one of mine because I liked the effect, but for the other one I cut it off.

2. Estimate the size of your heading. Because we are printing on normal 8x11 paper, chances are it won't cover the entire binder. To solve this, simply place a second piece of blank paper underneath to extend the length. Don't worry if there's a blank white strip, this will be the place for the heading. 

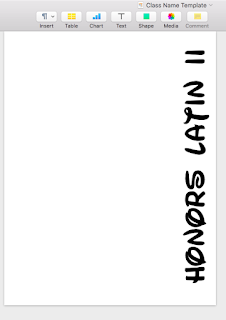
3. In a blank document, type the name of the class into a text box. Then, rotate the box so it's 90ΒΊ. Once you do this, you can move it to the left or right of the page (depending on where you put your blank strip). The size of the text will depend on the thickness of your strip.  

Because both pages are white,
 it's hard to see where one stops
and the other starts
4. Print out the page with your heading and slip the paper underneath your coloring page, replacing the blank page you used as a guide. It should now be the length of the binder.

5. Slip pages underneath the clear front pocket of your binder (if you haven't done so already).


And here's the finished product:


I went with a Disney theme, but you can do whatever you'd like. I also found fonts that matched the photo. The font on the AP Bio binder is bold Lithos Pro (a font used in Animal Kingdom), and the Latin binder is Waltograph. 


The best part about these is that you can color them throughout the year or change them if you get bored. 

Happy Back to School! ✏️

Friday, August 19, 2016

Disney's Animal Kingdom Lodge

This is my last Disney post for Disney week. *sigh*


Today I'm going to talk about Disney's Animal Kingdom Lodge's pros and cons, as well as some tips.


The resort is split between two buildings: Kidani Vilage (where I stay) and Jambo House. Kidani is the Disney Vacation Club part of the resort. Rooms are essentially more like mini apartments. Kidani has a small gift shop and a very home-y feel. While it's typically meant for DVC members, I do know non-members who have stayed there.

Jambo House is much bigger, and is home to a large breakfast buffet at Boma. It has a huge gift shop and definitely feels more like a hotel, if you ask me. I've never actually stayed there, but I did eat at Boma on my most recent trip.

Bonus: All of the rooms were just refurbished this year!
Phoebe reading by the savannah!

Pros

First off, the pros:

🦁 The Views! If you book a savannah view, you will not be disappointed. There are giraffes, ostriches, zebras, and more! The animals are confined so that they don't come too close to the guests, but they still come pretty close. We had this one ostrich that wandered outside our room every day. My niece appropriately named him "Mr. Ostrich". If you can't get a safari view, no worries! There are two viewing areas by the lobby, and the animals can be seen through the windows in the hallways.

🦁 Distance to AK You could probably assume this given the name, but Animal Kingdom is only a 5 minute (maybe less) bus ride away from the resort, so buses are pretty easy to come by.

🦁 Activities I'll talk about this in a little bit...

Cons

Now for the cons...

🐡 Distance Because of the animals, like Animal Kingdom, the Lodge is pretty far from the rest of the parks (on Osceola Parkway). It's a decent bus ride to and from, not including traffic. So if you're looking to go to a park opening, prepare to leave early. If you love Animal Kingdom, it shouldn't really be an issue. But if you, like me, don't visit AK as often, this is a drawback.

🐡 Buses My family loves to walk to the parks (we find it much easier), which would explain why we usually prefer to stay at The Boardwalk or Baylake Tower (both resorts offer a walkway to one or more parks). For Animal Kingdom Lodge, the only transportation is a bus. This is me being very picky because I love the monorail and the exercise, so for me, this is a con. It's probably the biggest con, actually. 

🐡 Size Because the resort pretty much sits on a savannah, the rooms wrap around the entire area. This means the hallways are long. We were on the main level, so it was about a 7 minute walk to and from our room. I kid you not. I know this kind of contradicts what I said earlier, but after riding an immensely crowded bus for 15-20 minutes on top of it being past 10, the last thing we wanted to do was walk the distance to our room. It's not a huge deal, considering you get to see animals all the time, but it is something to consider.

Tips

πŸ— Take advantage of the activities going on at the resort. One morning, we had nothing to do, so we walked outside and got to put together feeding boxes for the giraffes. Because we did it, we received a giraffe bead. Other families had many other kinds of beads from actives at both
Here we are putting together the feeding boxes 🌿

Kidani and Jambo. Had we been staying longer, we probably would have done more, but alas, we had a short timeframe.

πŸ— If you can, try to to get a savannah room. It really is worth it! The kids loved waking up and sitting on the balcony to watch the animals! 

πŸ— Check out the pool! I must admit, I'm not a pool person. My parents and I prefer to go, go, go. But my nieces love to swim, so we walked to the pool. It's a hidden spot tucked away, but it was really nice. Per the Disney way, it was themed to the resort. My nieces loved it! It was a great way for them to take a break without  losing the Disney fun.

The slide at the pool 

πŸ— If you're eating at Boma, the restaurant at Jambo House (or Sanaa at Kidani), and you're staying at the opposite part of the resort, take the shuttle! It runs to and from the resorts. You can walk or take a taxi, but it's a great option nonetheless. It was the last day of our trip, so we took the shuttle. 


If you or your family loves animals or Animal Kingdom, Animal Kingdom Lodge is a great choice. However, if you prefer Magic Kingdom or Epcot, a closer resort would be a better option. My nieces LOVED it, while my parents and I like it, but would prefer to stay somewhere closer to MK and Epcot. It truly depends on your preference!

Tuesday, August 16, 2016

Disney Springs and the Cupcake ATM

As we continue our week of Disney, I'll be talking about the newly renovated Disney Springs and (more importantly), the cupcake ATM there. Yes, I said cupcake ATM.


I should start by saying that this was my third trip in a year, so I got a sneak peak of Disney Springs beforehand. However, each time there was a portion blocked off. When we got off the bus, we were plopped into that previously restricted area.

In a nutshell, the area reminded me of a shopping outlet. Many high end stores like Kate Spade and Origins were in the area. New restaurants were open too. It was a lot to take in at once.


As we walked to the old side of the Springs (think World of Disney and the Co-Op), we noticed small details like a water crank (spinny thing? tube?), where guests could spin a wheel to carry water up from the water. The bridge overlooked perfectly blue water, and the newly signature water tank emblazoned with "Disney Springs" sat overlooking the area.

The non-restricted but still relatively new side has many restaurants and new shopping areas as well, including a sushi restaurant, Irish pub, and small kiosks.

We also saw that restaurants such as Planet Hollywood and Fulton's Crab House were in the process of being renovated. For those interested, Planet Hollywood is being given a new entranceway and losing the stars as well as other updates, and Fulton's Crab House is being given a complete modern redesign and a new name, Paddlefish.

After eating, shopping, and walking around, we made a final stop before going back to the hotel -- the cupcake ATM.

Now, no one really cared (except for me) to stop and do this. They were grumpy and thought it was pointless, even calling it a "teen girl thing". But I insisted (this was the one thing I wanted to do), so we did it.

The ATM has a jingle that plays, but we meant business, tapping the screen before the jingle even had a chance to begin. There's a pretty good selection of cupcake flavors. We decided on red velvet, dark chocolate, and black & white.

After completing the purchase, the screen showed the cupcakes being put into the ATM opening. This was where my dad began understanding that, yes, it's like an actual ATM. The automatic door opened, revealing three small boxes, which my nieces helped to grab.


By the time we returned to my brother and his wife, my dad was telling them how it really was an ATM. They all had thought someone behind the counter put the cupcakes through the hole or it was just an order window.

That night, I ate my cupcake (red velvet), and it was amazing. The cake was moist, the frosting sweet. I must confess, I wiped a bit of frosting off, but it was delicious nonetheless. Even my nieces, who don't like cupcakes or cake in general, tried bites and thought it was really good.

If you find yourself in Disney Springs looking for a sweet snack, the cupcake ATM is definitely an experience worth trying πŸ˜‹.

Sunday, August 14, 2016

Jedi Training at Walt Disney World

I just got back from Disney yesterday, so you could say I haven't exactly lost the Disney spirit. So....for the next week my posts will all be Disney related. #sorrynotsorry


While I was in Disney, my nieces did the Jedi Training Academy at Hollywood Studios. It's something my parents always wanted me to do (even tried bribing me), but, much to their dismay, I was the princess type. My nieces, on the other hand, LOVE Star Wars. Since Penny is 9 and Phoebe is 7, they were both eligible to participate (the age limit is 12).

Penny & Phoebe on stage
We woke up bright and early so that we could get right in at opening. My family stayed at Animal Kingdom Lodge (more on that another time), so it was a 15-20 minute bus ride to the park. While on the bus, a family next to us informed us that when they signed their kids up, they got to the park at 8:00am. It was already 8:30, so the pressure was on. My brother handed his bag to my mom so they could get through faster, and prepared to run with the girls to the sign up spot, located between Indiana Jones and the Prime Time Cafe.

I didn't see them again until about 9:15. According to my brother, a long line was waiting for them. When they made it to the front, the cast members asked about fast passes and reservations to find the best time for them, and the girls were put in the 11:30 show. Success!

At around 10:40, the designated time to arrive to prepare for the show, we brought the girls to the spot where they signed up. They were brought to a shady "queue" and sat down. It was already piping hot outside, but we were happy to see a cast member handing out cold water to the kids.
Olaf!

At this point, my parents and I left to grab front row spots to watch the show. While my parents waited for spots, I hopped in line to meet Olaf. It was only a 10 minute wait and I was wearing a Let It Go shirt--I had to.

Here's Phoebe in Jedi mode
When the group of kids processed to the stage in their robes, the park was even hotter than before. The kids were sweating, and I was told that my nieces were already itching to take their robes off. A nearby mom remarked the same about her own daughter.

The show started, and the storyline unfolded. By the time the show ended, the girls were red with sweat and ready to cool down. (Crazy to think that the day got even hotter and more shows were taking place.)

Overall, it was fun and the girls enjoyed participating, but if you are planning on doing it in August or even July, be prepared for the humidity and high temperatures.

The Force is much stronger when the heat is at bay πŸ˜†.

I'll be adding a video of the show later, so check back soon!


Tuesday, August 9, 2016

Handling New Ideas


What if [insert amazing story idea here]…. This is often how I come up with new ideas. It might be a random thought, an observation, maybe even a dream (which is where my latest WIP came from πŸ’‘ ) No matter how ideas come about, there has to be a way to bring them to life. I use a four step process to insure that, whatever it is, it’s something I’d like to spend time on.

1. WAIT ⏱

My first step is to wait. I let the idea sit around and see what it does. If it’s something I’m really into, it will sit in my head and refuse to leave. This past NaNoWriMo, I was working on a story I really loved. Then I had a dream about a completely different story! What’s a girl to do? As I was in the middle of NaNo, I decided to wait, and figured it would dissolve into some old thought I once had a dream of. Nope! Boy, was I wrong. The idea bothered me constantly. I would always think about it and ask myself questions and wonder. How would marriage work? Why would society be arranged in this way? I found myself craving answers. So, I moved on to step 2.

2. BRAINSTORMπŸ€” 

The next step is to brainstorm. I did this using Ulysses, my favorite writing program, which you can read all about here. I started by writing out the gist of the plot and, because it’s utopian, elements of the story world. I did my best to answer the questions that had, for lack of a better word, plagued me. I also researched character names and generally described each MC. I picked out my POV and decided on 3 first person POVs (I feel crazy just writing it 😬). I spent some time getting to know the story. It was far from done (I’m still figuring out certain details), but it felt good to get all of my ideas down on paper. I used this time to work out little plot details and just get excited because OMG I have a solid idea! I printed out my brainstorm sheet and made little notes where I needed to figure out certain things. It was time for step 3!

3. WRITE πŸ’»

I know, I know, you’re thinking “Isn’t this a FOUR step process? How come writing is step 3?” My next step is to try writing the idea. Because you can plan out all you want, but nothing beats putting yourself into the characters’ shoes and writing. Sometimes it just isn’t possible to write something. Not every idea is a good fit. And that’s O-K. By trying it out, you can find if you like these character’s enough to become them every day. I know this also sounds bonkers, because you create the characters, so why wouldn’t you like them, am I right? But…characters have a funny way of becoming their own person with their own ideas and plot twists. Nevertheless, make sure this is a story you could foresee a future with. Think of it like finding a boyfriend…sure you pick out the guy you go out with, but it might not be the best fit. And why would you want to date a guy who you wouldn’t want to spend time with and who you don’t see a future with? Point made…it’s time to move on to step four, the final step.


4. PLAN πŸ“


Step four isn’t completely necessary, and it fully depends on whether you fancy yourself a plotter or a pantser. I myself am a plotter, so this step is very very necessary. I use this time to really get to know my story and my characters. I write up scene plans and fill out character worksheets. On her website, Jill Williamson offers character worksheets, and Go Teen Writers (which Jill writes with fellow authors Stephanie Morrill and Shannon Dittermore) has scene planners too. I took each one and formatted them to form worksheets, which I color coded and changed fonts for (I’m a real sucker for cute fonts).

Recently, I've become obsessed with outlining and its many possibilities. If you'd like to hear about them, you'll find the article here.

In conclusion, I wait, brainstorm, write, then plan. This process isn’t for everyone, but I’ve found it really helps my stories along. I love this process because it allows me to be flexible while remaining prepared.


Friday, August 5, 2016

The Wonderful World of Characters


Characters. We wouldn’t have stories without them — these twisty, three dimensional, abstract entities of matter with minds of their own.

I like to figure out my characters using a character worksheet. I downloaded one from Jill Williamson’s website, then formatted it and changed fonts until it fit my personality. I find I often am surprised by the answers I write down. Characters really do have a mind of their own.
Character Worksheet
Character building is
very extremely important because it helps you to better understand who you’re writing as. Writing becomes easier when you know what motivates your character, what they’re willing to sacrifice, what they value, what their goals are, etc. By knowing these things, it’ll be easier to see where the story is going.
On the Go Teen Writers site, there are multiple posts that explain the character worksheet and how to use it. I highly recommend that you check them out!
As far as the importance of characters, it probably seems obvious and totally unnecessary to explain (but I’m going to anyways). The characters are the core of the story. They are the reason the reader keeps reading. If a character is written well, the reader will want to root for the character and see them succeed. They’ll keep reading to see through that outcome. Characters who are flat and boring won’t engage the reader. The book will be closed, the story abandoned.
Magic-1443715074Harry Potter was the boy who lived. We meet him as this poor boy with broken glasses and a lightning bolt-shaped scar, living in a cupboard under the stairs because of his terrible relatives. Immediately, we are drawn to this character. As we see him learn about the wizarding world and arrive at Hogwarts, we want to see him succeed. As he
undergoes challenges, we find ourselves enthralled and committed to seeing this boy come out victorious.
Characters are pretty awesome, am I right?  

Sunday, July 31, 2016

The Outline: Your Novel's Roadmap


About a month ago, I purchased James Patterson's Masterclass. The class has not one, but two sections about outlining. Mr. Patterson swears by it, and makes a strong case as to why it's necessary for all writers. Included in the class is the outline for his book Honeymoon. 

Now I should start by saying that it's long (27 pages to be exact), and it was definitely intimidating at first. Mr. Patterson is pretty vague when it comes to how to actually write the outline, so it was a bit daunting to actually begin.

Once I began writing, however, it wasn't hard. I wrote and wrote and wrote. Patterson explains that the point of the outline is to establish the story. So that's what I did.

Believe me when I say, it feels absolutely amazing to get the story down and see it all on paper. (There may have been some paper-smelling, no regrets. There's absolutely nothing like the smell of fresh ink on paper.)

James Patterson spends 3 months working on an outline. I know what you're thinking. Three months?! I had the very same reaction. That is until I reread my outline and went to work editing it. I scrutinized and scribbled notes all over until some paragraphs were hardly recognizable...and it felt great.

I have this habit where I "talk out" the novel to myself. I basically brainstorm out loud and work through plot points. By doing this, I suddenly realized that my ending was all wrong.

The best part about outlining is the flexibility. You can change plot points and huge conflicts without feeling like you're wasting months of work. I was able to fix the ending without losing months of work. It also made parting with the original ending far easier.

Below I've outlined listed some tips for outlining your novel:

πŸ“Just Write: Don't worry about being perfect. The flexibility of the outline will allow you to change anything that doesn't work. Write whatever comes.

πŸ“Take Your Time: The more time you take on your outline, the easier it will be to write your actual novel. If it's fleshed out enough, it'll prevent you from writing yourself into corners. It won't cure writers' block, but it will definitely help.

πŸ“Plan It Out: As I said before, your main goal is to write the story down. Think of your outline like your novel's roadmap. It'll guide you through the plot and keep your writing concise.

πŸ“Have Fun: The most important part is to have fun! Outlines are always changeable, so let yourself get lost in the story.

Going in, I had my doubts about outlining. Now, I can't imagine writing any other way. πŸ“š